Functional Description for the nomad XS
General Overview and Information
The Truvami nomad XS device is a powerful and flexible GNSS tracking device that integrates a multi-standard GNSS module and sensors such as accelerometer, pressure sensor, light sensor, magnetometer, gyroscope, temperature sensor and hall sensor into one miniature device.
Device Initialization and Joining
This overview shows the general procedure at start-up. To activate the device put the magnet on the device on the designated spot for at least 3 seconds until you see the LED flash.
After activation, the device starts to join to the LoRaWAN network. If a network connection is established, the device will start to track the asset and start to send messages to the LoRaWAN network server, such as location fixes and status updates.
If a join trial fails, the device will retry the join in a predefined interval. You can set these intervals via a downlink. (Default value is 10 minutes)
Operation modes
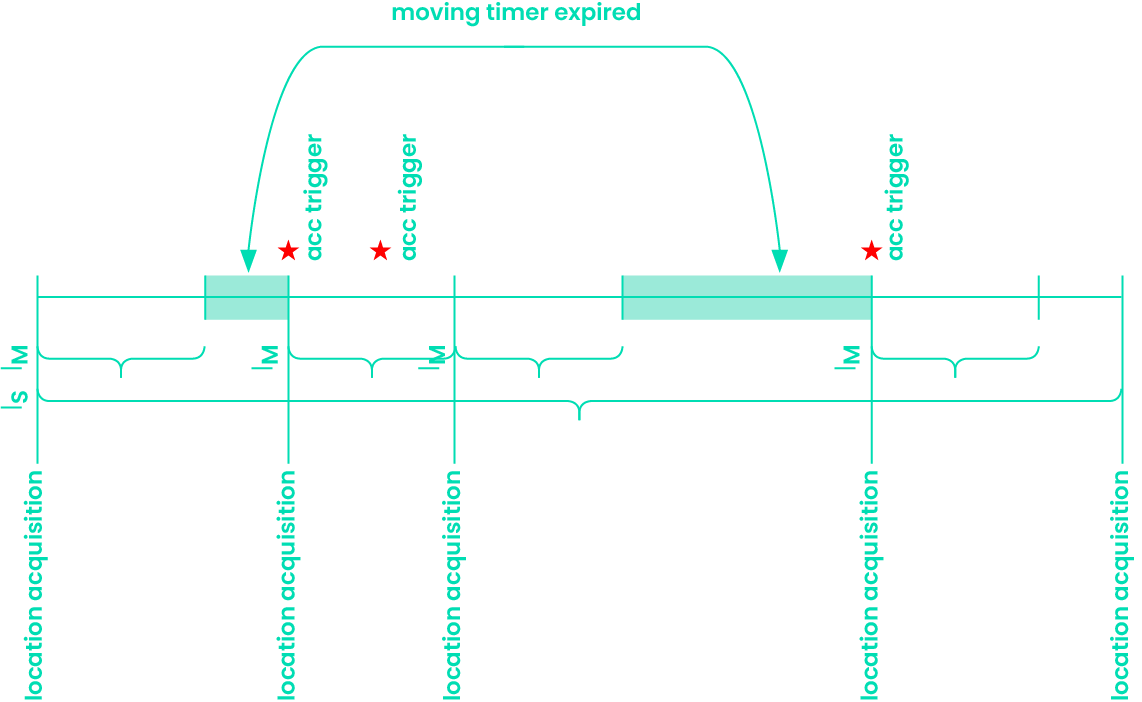
Our tracker operates in two intervals: a steady interval and a moving interval. During the steady interval, it periodically tracks the asset's location when it is not in motion. When motion is detected, it switches to the moving interval for more frequent location updates. When there is no motion, it reverts to the steady interval. In between intervals, the device enters sleep mode to conserve power. This approach ensures timely updates, power efficiency, and long battery life.

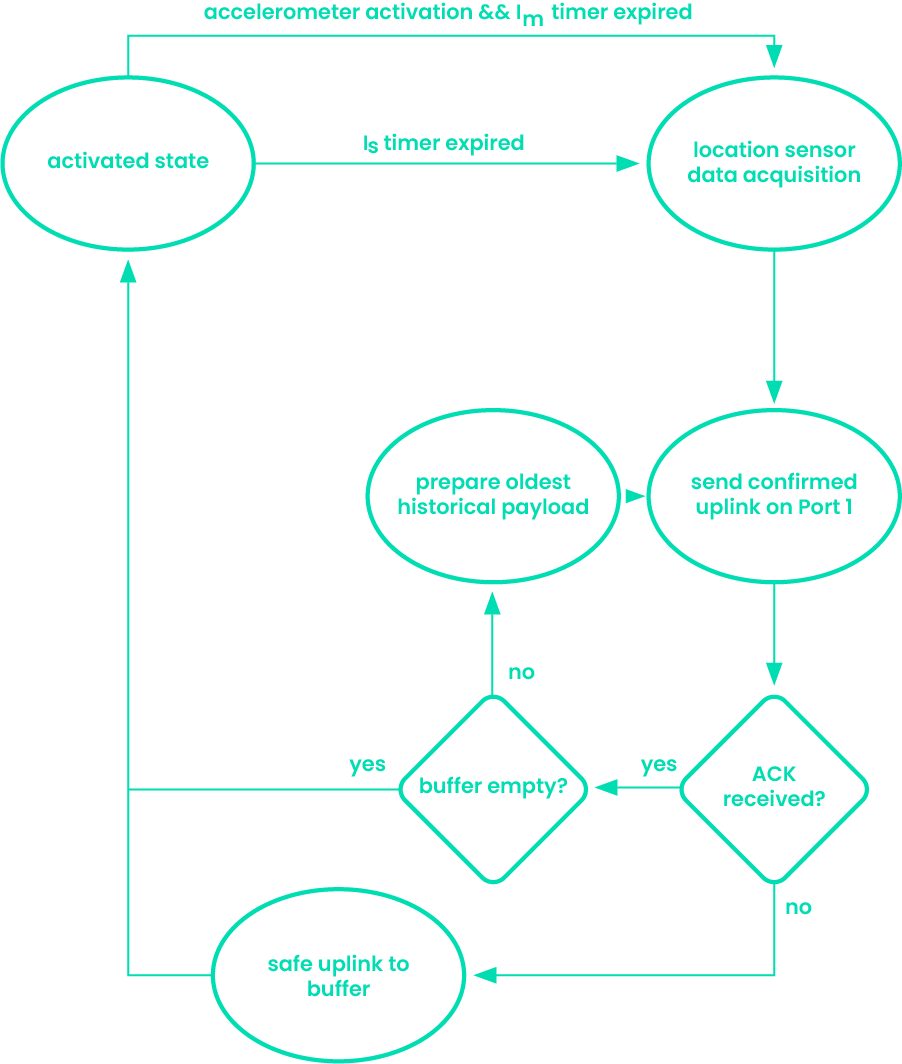
nomad XS location acquisition
All mentioned device tracking time periods are adjustable. Consider the Payload documentation.
The device tracks the location with GNSS scans and sends the collected data through a gateway to a backend sever.
nomad XS moving/steady intervals

Example: Is, Im intervals with Accelerometer trigger
Low Power state
In case of low battery, the device will not try to collect location data and will not send any uplinks / join requests. This threshold is 3.6V, to get out of threshold the battery voltage has to exceed 3.7V
Device Reset
To reset the device, place the magnet to the designated spot for 10 seconds.
Charging the device
The device can be charged in two ways:
-
Direct Sunlight: The device can be charged by exposing it to direct sunlight.
-
Charging Pads: The device can also be charged using charging pads. Note: Charging via charging pads requires a sophisticated setup, including compatible charging infrastructure and proper alignment to ensure efficient energy transfer.
For support, please submit a ticket. We will provide support as promptly as possible.
For questions, please write an email to [email protected]